In the previous post, How to Secure Ubuntu 24.04 on a RackNerd KVM VPS , we covered the following:
- Enabling 2FA on the VPS provider account and control panel.
- Logging in as root once, then updating, upgrading, and rebooting the system.
- Creating a non-root sudo user.
- Setting up SSH key authentication and disabling password login.
- Disabling root SSH login.
- Setting the server timezone.
- Enabling unattended security updates.
- Configuring UFW to allow SSH, HTTP, and HTTPS while denying all other inbound traffic.
- Installing and tuning Fail2Ban, with a 3-hour ban time.
- Running YABS to benchmark the VPS and save a baseline.
The idea was simple: secure first, deploy later. Now that the server is locked down, it’s time to put it to work.
In this post, we’ll install Docker, set up a clean folder structure for backups, point a domain to Cloudflare, and deploy our first two self-hosted services — n8n and Caddy — behind a proper reverse proxy with automatic HTTPS. By the end, you’ll have a production-ready workflow automation tool running securely on your own VPS.
Let’s get into it.
Install Docker
For this setup, I’ll be using Docker to manage applications easily and consistently.
The official Docker docs for installing the Docker Engine on Ubuntu are already clear and straightforward, so I’ve listed the exact steps here for convenience.
Add Docker’s official GPG key:
sudo apt update
sudo apt install ca-certificates curl
sudo install -m 0755 -d /etc/apt/keyrings
sudo curl -fsSL https://download.docker.com/linux/ubuntu/gpg -o /etc/apt/keyrings/docker.asc
sudo chmod a+r /etc/apt/keyrings/docker.asc
Add the repository to Apt sources:
sudo tee /etc/apt/sources.list.d/docker.sources <<EOF
Types: deb
URIs: https://download.docker.com/linux/ubuntu
Suites: $(. /etc/os-release && echo "${UBUNTU_CODENAME:-$VERSION_CODENAME}")
Components: stable
Architectures: $(dpkg --print-architecture)
Signed-By: /etc/apt/keyrings/docker.asc
EOF

sudo apt update
Install Docker:
sudo apt install docker-ce docker-ce-cli containerd.io docker-buildx-plugin docker-compose-plugin
By default, you have to use sudo every time you run a Docker command. To run Docker as your non-root user instead, add your user to the docker group:
sudo usermod -aG docker $USER
newgrp docker
That last command refreshes your group membership without needing to log out and back in. From here on, you can run docker commands without sudo.
Build a Folder Structure for Backups
Before deploying anything, it’s worth organizing your file structure properly, since we’ll be setting up Restic for backups later. Getting this right now saves a lot of cleanup down the road.
sudo mkdir -p /opt/docker-data
After creating the docker-data folder, which will hold all of our application data, grant your user permission to it:
sudo chown -R $USER:$USER /opt/docker-data
Every service we deploy from here on will live inside /opt/docker-data/<service-name>/, keeping things predictable and easy to back up.
Point a Domain to Cloudflare
I recommend using Cloudflare for your DNS records, since the free tier is generous and adds several useful security layers out of the box — including DDoS protection and IP masking through its proxy.
In the Cloudflare dashboard, go to the DNS Management section for your domain and create an A record:
| Field | Value |
|---|---|
| Type | A |
| Name/Host | @ for the root domain, or a subdomain name (e.g. n8n) |
| Value/IP | Your RackNerd VPS IP address |
| TTL | 3600 (or 600 for faster propagation while testing) |
Once this record is live, your domain (or subdomain) will resolve to your VPS, which is a requirement for the automatic HTTPS setup we’ll configure next.
Installing n8n and Caddy
Caddy is a web server and reverse proxy, and it’s a great fit here because it handles HTTPS automatically. It can also serve static files, terminate TLS, manage certificates, and route traffic to backend apps — all with minimal configuration.
n8n is a workflow automation tool, similar to Zapier or Make, but self-hosted. We’ll run it behind Caddy so it’s never exposed directly to the internet.
From /opt/docker-data, create a directory for n8n:
mkdir n8n
cd n8n
Create the Three Required Files
Inside the n8n folder, create three configuration files.
File 1: .env (environment variables and secrets)
nano .env
Paste this content, replacing yourdomain.com with your actual domain:
DOMAIN=n8n.yourdomain.com
N8N_HOST=n8n.yourdomain.com
WEBHOOK_URL=https://n8n.yourdomain.com/
N8N_ENCRYPTION_KEY=change-this-to-a-long-random-string
After saving, lock the file down so only you can read it:
chmod 600 .env
File 2: Caddyfile (reverse proxy config)
nano Caddyfile
Paste this content:
n8n.yourdomain.com {
    reverse_proxy n8n:5678
}
File 3: docker-compose.yml (infrastructure definition)
nano docker-compose.yml
Paste this content and adjust as needed:
services:
  n8n:
    image: docker.n8n.io/n8nio/n8n:latest
    container_name: n8n
    restart: always
    networks:
      - n8n_net
    environment:
      - N8N_HOST=${N8N_HOST}
      - WEBHOOK_URL=${WEBHOOK_URL}
      - N8N_ENCRYPTION_KEY=${N8N_ENCRYPTION_KEY}
      - N8N_PORT=5678
      - N8N_PROTOCOL=https
      - NODE_ENV=production
      - TZ="<YOUR_TIMEZONE>"
      - DB_SQLITE_POOL_SIZE=5
      - N8N_ENFORCE_SETTINGS_FILE_PERMISSIONS=true
      - N8N_PROXY_HOPS=1 # Critical: tells n8n it's behind a proxy
    volumes:
      - /opt/docker-data/n8n/data:/home/node/.n8n

  caddy:
    image: caddy:latest
    container_name: caddy
    restart: always
    ports:
      - "80:80"
      - "443:443"
    networks:
      - n8n_net
    volumes:
      - /opt/docker-data/n8n/caddy_data:/data
      - /opt/docker-data/n8n/Caddyfile:/etc/caddy/Caddyfile

networks:
  n8n_net:
    driver: bridge
Launch the Stack
Once those three files are saved in /opt/docker-data/n8n/, start the stack:
docker compose up -d
In a second terminal, tail the logs to confirm everything comes up cleanly:
docker compose logs -f n8n
If you run into permission errors on the data folder, fix ownership with:
sudo chown -R $USER:$USER /opt/docker-data/n8n/data
Why This Structure Works
- Centralized — everything for this service lives inside
/opt/docker-data/n8n/, so nothing is scattered across your home directory. - Clean — your home directory stays free of service clutter, no matter how many apps you add later.
- Backup-ready — when you set up Restic, you just point it at
/opt/docker-data/, and it captures every service’s config and data (including n8n’s workflows and credentials) automatically. - Zero exposed ports — by removing the
portsblock from then8nservice, it becomes physically impossible for anyone to hit n8n directly from the internet. It only exists inside the privaten8n_netDocker network, reachable solely through Caddy. - Automatic SSL — Caddy sees your domain in the
Caddyfile, automatically requests a Let’s Encrypt certificate, and handles HTTPS termination for you, with zero manual renewal.
First Login to n8n
Open your favorite browser and navigate to the domain where n8n is hosted.
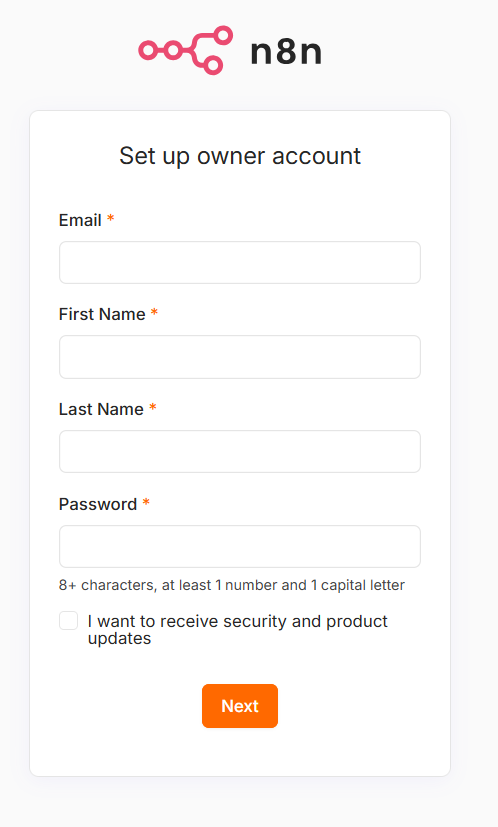
I’d recommend grabbing the free license key on first login, since it unlocks a handful of useful features at no cost.
At this point, you’ve deployed a production-ready, reverse-proxied, and properly secured n8n instance — running entirely on infrastructure you control.
Found this useful? In the next post, we’ll walk through configuring Restic for automated, encrypted backups of everything in /opt/docker-data/. If you spot an issue or have a suggestion, drop a comment below. I’d love to hear how your own homelab setup is going.